Okay – now that I have a box it is time to wire it all up.
After playing around with various methods of switching I settled on a bunch of solid-state relays connected to the arduino.
The advantage of solid-state relays over mechanical onese are that they switched quicker, are less likely to arc and don’t require any additional components to up the voltage in order to throw them. I ended up with a bunch of FSS1-102Z relays which can be bought from jaycar for about $12 each as part SY4088.
These relays can switch 250VAC happily with only a 5V switch current. This means I could wire them straight to the arduino.

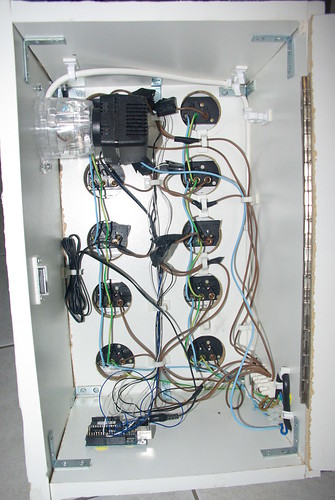
Power comes into the box from the side goes to two distribution blocks.
One block splits the earth (green) and neutral (blue) lines into three sets with one set going to the internal powerpoint (used to power the arduino plugpack) and the other two sets going up the left and right columns of power points. Each powerpoint is linked to the one above it which helped to keep the wiring minimal and tidy.
The other, much larger, block provides a bunch of points for connecting the live (brown) wires. From here power is sent to the internal powerpoint and one live wire to each row of powerpoints.

The live wires go up to each row and are split in two at the
last moment to each connect to one point on the load side of a relay.
The other point on the load side of the relay connects to the live plug
on the powerpoint.
On the input side of the relays the negatives are all linked together and head down to ground on the arduino.
The positives are kept separate and go down to the digital outputs on the arduino.
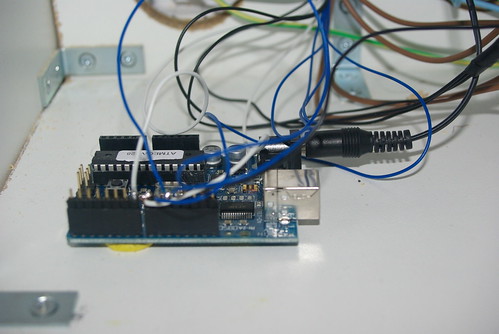
To make things a bit easier for testing I soldered each of the incoming lines to a row of pin headers. This means I can quickly unplug/plug in the lines to the arduino in case I need to use it elsewhere. It also helps to keep them in order 🙂
Because this box is running 240V I added a small 240v light to the top of the box that is lit up whenever the box has power (even if the arduino is not running) This just serves as a little warning.
The final result is seen below
Next up – the software!
tq